In this post, I'm going to briefly describe one "method" (I dare not call it a "technique"...) to paint small scale figures. I usually take this approach in the following scenario: it's 3 PM on a Sunday afternoon, you just completed a model and would like to add a human element, in the form of a single pilot or groundcrew figure standing next to it. But without spending too much time ( I know that modellers are supposed to be patient and take their time and all, but we're only humans - albeit "weird" ones - and do get impatient too...).
Before I start, let me briefly state that:
- I do not consider at all the final result to be any good, but quick.
- It'a 1:72 figure, so it's tiny
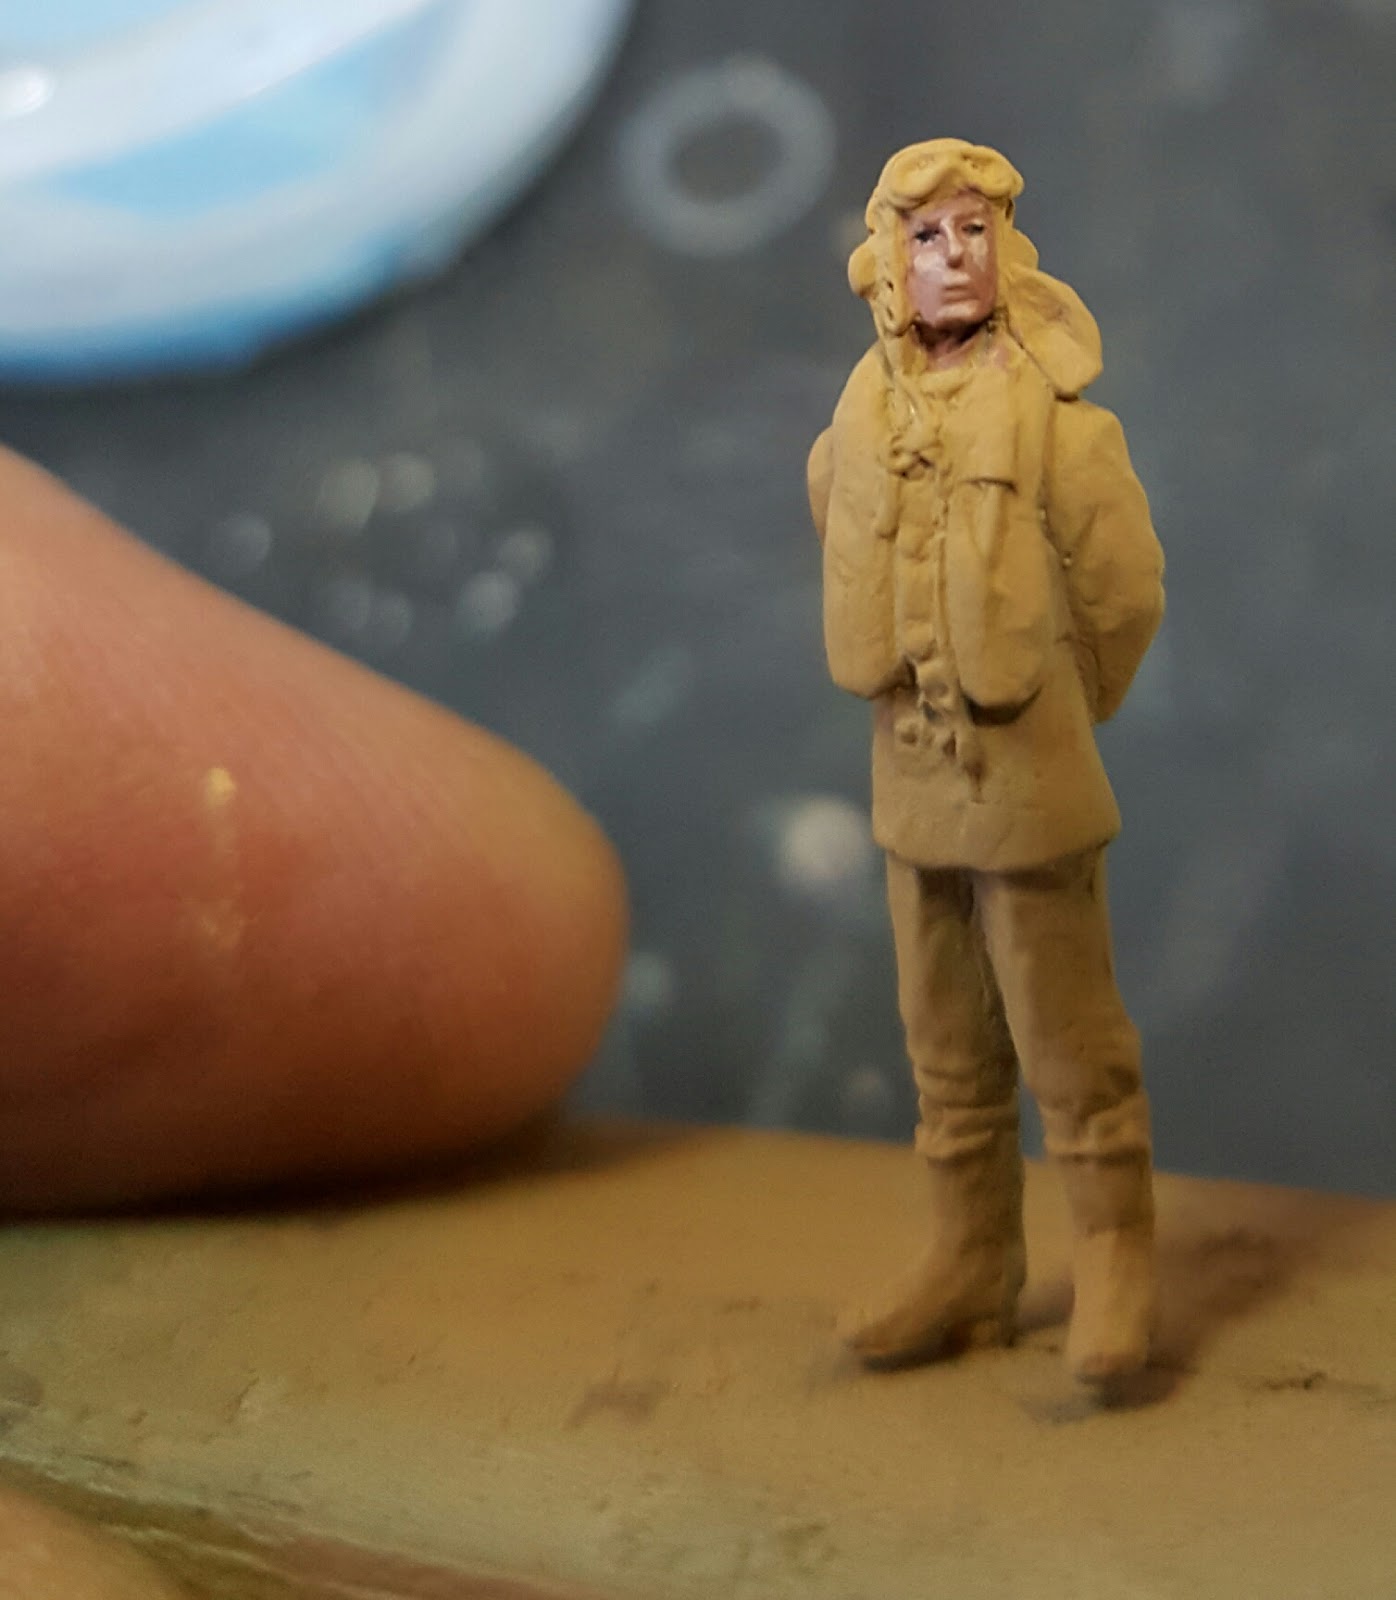
The figure I picked for this post is a 1:72 white metal offering from Gunthwaite Miniatures, that offers a nice range of Royal Navy and Fleet Air Arm figures, most of them can easily pass for RAF or even other nations.
Here is the figure primed with a light airbrush coat of Tamiya Sand Yellow ( the pinkish blob on the left is my finger)

First is the flesh base, made with a mixture of Vallejo Brown Sand 876 and a dash of 946 Dark Red

Next a few higlights, above the cheeks, below the eyes, on the nose, chin and upper lip. I used the base colour lightened with Vallejo "1st light colour" from their flesh painting set.

Next are some shadows, on the sides of the nose, under the lower lip and chin. There is also a shadow lining all around the face where it meets the helmet. The colour used is base flesh + 2nd shadow from the Vallejo paint set ( I still need to figure out what good is their 1st shadow colour, never been able to use it for anything). I also put a very diluted veil of 945 Magenta on the cheeks to "liven up" the face.

Next step, although optional, is to add a little "sparkle" to the eyes. I just used a micro dot of Vallejo 918 Ivory, which is far more covering than any other white paint I ever used. Note that the dot has been put in the center of the eye, not the sides. (Sorry for the blurry picture here...)

Now the uniform. I used a mix of Medium Blue 963 and Dark Sea Blue 898, with a drop of Tamiya flat base, to kill the shine inherent to Vallejo's dark blue paints.


Boots and helmet receive a coat of 862 Black Grey and 822 Cammo Brown respectively.

Uniform gets some shadows by using the base coat with more Dark Sea Blue added.


Next the life preserver gets some highlights and shadows. For highlights, try light yellow or Ivory, whereas for shadows, nothing beats Violet when it comes to darken yellow.

The helmet receives highlights made by mixing Cammo Brown with Orange. Here again the contrasts are quite harsh.


The idea is to used controlled washes with oïl paint. Actually, rather than "washes" as we know them, it's more something I like to call "wet-brushing". Think of "drybrushing" but with heavily diluted paint instead.
Here is the palette I used. A mixture of Dark blue and Black will be used for the uniform, Van Dyck Brown and Sepia for the vest and helmet.

- The harsh contrasts created by the highlights will be somewhat "blended"
- Darkest shadows will be further enhanced
Here is the final result. Surely, I could have done MUCH better, but for a one-hour painting session, it's not too bad, right?


Treflon